
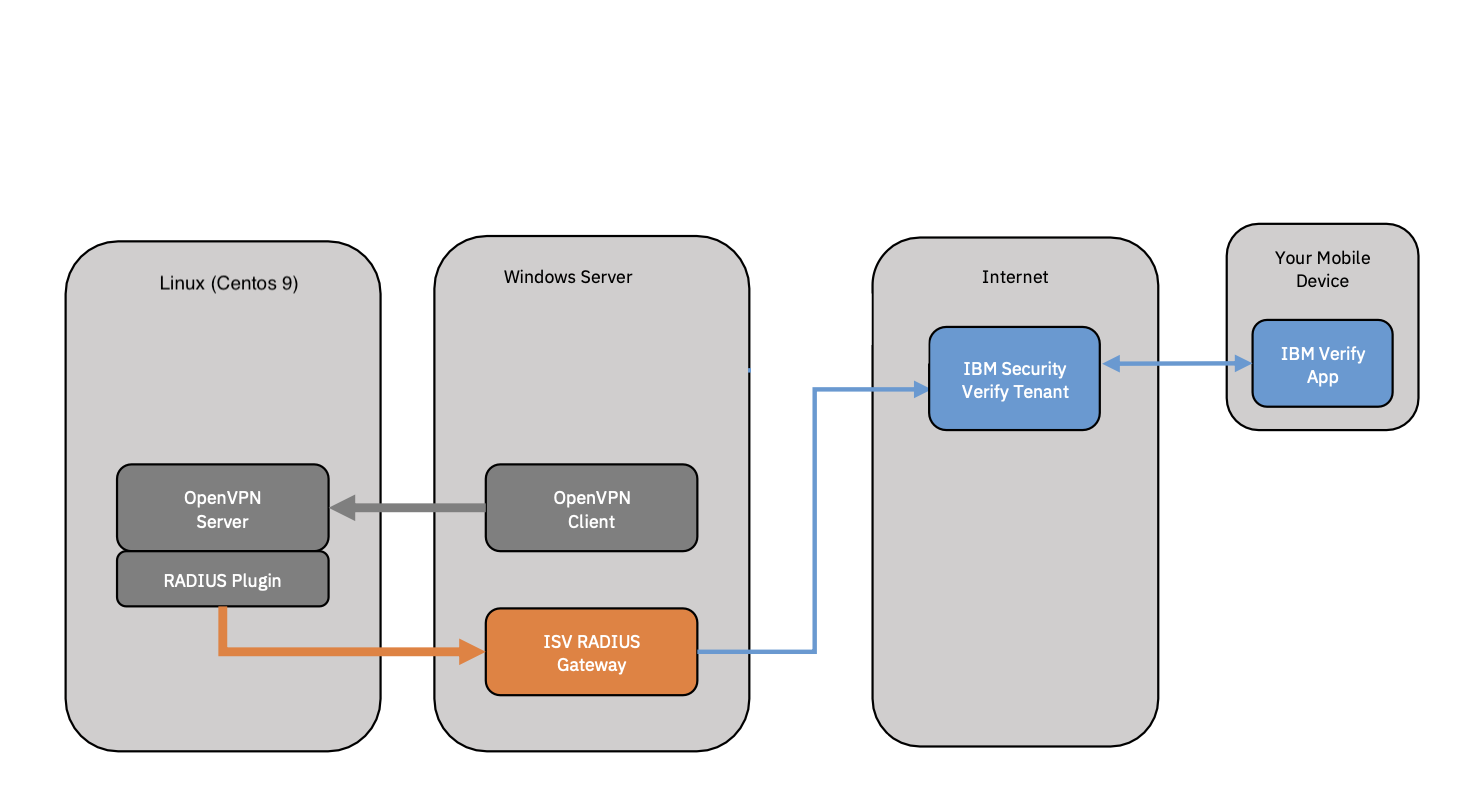
Openvpn With Radius And Multi Factor Authentication
Setting up a VPN server to allow remote connections can be challenging if you set this up for the first time. In this post I will guide you through the steps to setup your own VPN Server and to connect to it using a VPN Client. Additionally I will also show how to setup a free OpenVPN server and a plugin to implement multi-factor authentication for additional security.
1. Installation OpenVPN server on Linux (using a fresh Centos Stream 9 Linux)
# yum update
# curl -O https://raw.githubusercontent.com/angristan/openvpn-install/master/openvpn-install.sh
# chmod +x openvpn-install.sh
# ./openvpn-install.sh
Accept defaults for installation of OpenVPN and at the end provide a ‘Client name’ e.g. ‘demouser’. I have chosen a passwordless client but if you want you can also add an additional password to protect your private key.
Client name: demouser
Do you want to protect the configuration file with a password?
(e.g. encrypt the private key with a password)
1) Add a passwordless client
2) Use a password for the client
Select an option [1-2]: 1
...
...
The configuration file has been written to /root/demouser.ovpn.
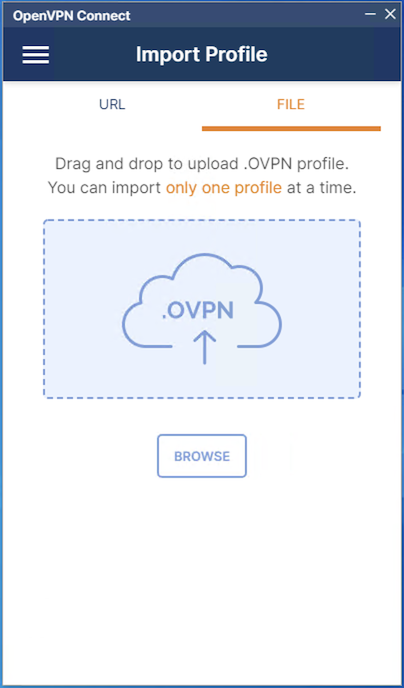
Download the .ovpn file and import it in your OpenVPN client.Finally a client configuration file is ready to be imported into the VPN Client.
2. Installation OpenVPN Client for Windows
Download the OpenVPN Client software from https://openvpn.net/vpn-client
Install the OpenVPN Client:
Once the installation is finished we can import the configuration file ‘demouser.ovpn’ which was generated on the OpenVPN server but before importing we need to modify the IP-address of our OpenVPN server within this file:
client
proto udp
explicit-exit-notify
remote 192.168.0.150 1194
dev tun
resolv-retry infinite
nobind
persist-key
persist-tun
...
Normally the remote IP by default will be the address of your public IP which is normal if you have your VPN server on your local network and need remote access from outside this network. You can leave the public IP address in the config but then you will have to open up the correct port and set the routing on your internet access point.
Finally we can test the VPN connection. The first time the connection will probably fail as the firewall on the OpenVPN Linux server is blocking the access. To quickly test this we can just disable the firewall using the command:
# systemctl stop firewalldAlternatively configure Linux firewall for OpenVPN connectivity:
# sudo firewall-cmd --add-service=openvpn
# sudo firewall-cmd --permanent --add-service=openvpn
# sudo firewall-cmd --add-masquerade
# sudo firewall-cmd --permanent --add-masquerade
# sudo firewall-cmd --permanent --add-port=1194/udp
# sudo firewall-cmd --reload
Now the connection should work:
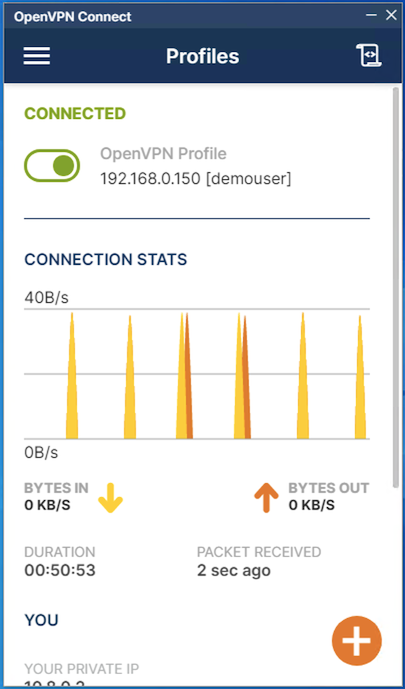
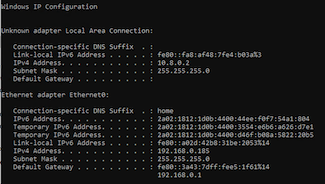
On the windows client you should now also get an additional VPN adapter configured with a default IP address of 10.8.0.2 (this subnet is defined within the file /etc/openvpn/server.conf).
3. The next step describes how to use RADIUS with OpenVPN.
First we will install the IBM Security Verify Gateway for RADIUS on a Windows machine. Documentation is available at: https://www.ibm.com/docs/en/security-verify?topic=integrations-security-verify-gateway-radius
This package can be downloaded from the IBM Security AppExchange here: https://exchange.xforce.ibmcloud.com/hub/IdentityandAccess (you will need to use your IBMid to login)

Extract and run the installation using ‘setup_radius.exe’.
Edit the RADIUS configuration file ‘c:\Program Files\IBM\IbmRadius\IbmRadiusConfig.json’:
-
Find the clients section in the configuration file.
-
The default file has three example client definitions. Delete these definitions and replace with the single definition shown above.
-
This definition will match any RADIUS client connecting from the network used by the test machines. The secret authenticates the client.
Save the file and close the editor.
{
	"address":"::",
	"port":1812,
/*
	"trace-file":"c:/tmp/ibm-auth-api.log",
	"trace-rollover":12697600,
*/
	"ibm-auth-api":{
		"client-id":"???????",
		"obf-client-secret":"???????", /* See IbmRadius -obf "the-secret" */
		"protocol":"https",
		"host":"???????.verify.ibm.com",
		"port":443,
		"max-handles":16
	},
	"clients":[
		{
			"name": "OpenVPN",
			"address": "192.168.0.0",
			"mask": "255.255.0.0",
			"secret": "Passw0rd",
			"auth-method": "password-and-device",
			"use-external-ldap": false,
			"reject-on-missing-auth-method": true,
			"device-prompt": "A push notification has been sent to your device:[%D].",
			"poll-device": true,
			"poll-timeout": 60
		}
	]
}
Complete the fields ‘client-id’, ‘obf-client-secret’ and ‘host’ with the correct information to point to your IBM Verify Saas API.
Before we can do this we will need to setup API access in IBM Verify Saas.
Login to your environment or go for a trial account if you don’t have one : https://www.ibm.com/products/verify-identity
From the main menu select Security > API Access > Add API client
Create a new API Client :
- Specify the entitlements by selecting the check box from the list:
- Authenticate any user
- Read authenticator registrations for all users
- Read users and groups
- Read second-factor authentication enrollment for all users
- Click next on the following screens and finally give the API client a name : e.g. ‘MFA-Client’
A Client-ID and Secret will automatically be created for you. Use this information to complete the RADIUS config. Use the c:\Program Files\IBM\IbmRadius\IbmRadius.exe -obf
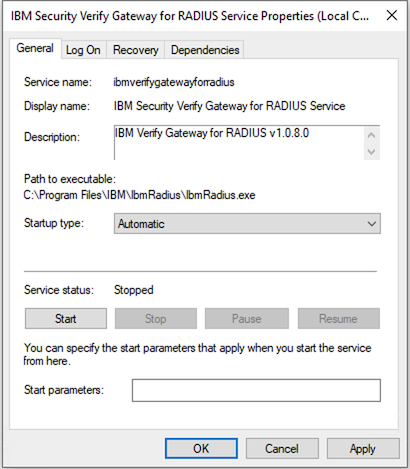
Finally configure the IBM RADIUS service to startup automatically and start the service:
Test RADIUS Authentication using the RADIUS tool : NTRadPing https://ntradping.apponic.com
You should get a push notification on the IBM Verify app on the mobile device.
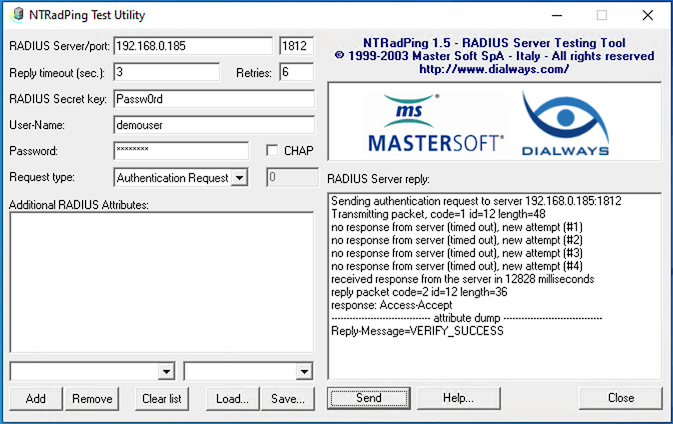
(Make sure you test with a userid that is known in IBM Verify Saas and is enrolled for OTP)
4. Install OpenVPN RADIUS Plugin
- Login to the Linux OpenVPN server and launch the following commands:
# wget https://www.nongnu.org/radiusplugin/radiusplugin_v2.1a_beta1.tar.gz
# tar -xvf radiusplugin_v2.1a_beta1.tar.gz
# cd radiusplugin_v2.1a_beta1
# yum install libgcrypt libgcrypt-devel gcc-c++
# make- Copy the RADIUS plugin files to /etc/openvpn
# cp /root/radiusplugin_v2.1a_beta1/radiusplugin.cnf /etc/openvpn
# cp /root/radiusplugin_v2.1a_beta1/radiusplugin.so /etc/openvpn- Edit the file /etc/openvpn/server.conf and add the following line to activate the RADIUS plugin:
plugin /etc/openvpn/radiusplugin.so /etc/openvpn/radiusplugin.cnf - Edit the file /etc/openvpn/radiusplugin.cnf and modify the ip address of the RADIUS server and set the sharedsecret to ‘Passw0rd’ (this is the secret that was also configure on the RADIUS server side). Make sure to set ‘nonfatalaccounting=true’ because the RADIUS server does not support RADIUS accounting.
...
NAS-IP-Address=<IP Address of the OpenVPN Server>
...
nonfatalaccounting=true
...
Server
{
	# The UDP port for RADIUS accounting.
	acctport=1813
	# The UDP port for RADIUS authentication.
	authport=1812
	# The name or ip address of the RADIUS server.
	name=<IP Address of the RADIUS Server>
	# How many times should the plugin send the if there is no response?
	retry=1
	# How long should the plugin wait for a response?
	wait=60
	# The shared secret.
	sharedsecret=Passw0rd
}
Save the file and restart the OpenVPN server using the command :
# systemctl restart openvpn-server@server.service- Finally edit the OpenVPN client file ‘demouser.ovpn’ and add a line ‘auth-user-pass’:
client
proto udp
auth-user-pass
explicit-exit-notify
remote 192.168.0.150 1194
dev tun
resolv-retry infinite
nobind
persist-key
persist-tun
...
This will allow the user to enter a username and password when initiating the VPN connection. These credentials will be authenticated against the IBM Verify Saas directory and this should result in a challenge request on the IBM Verify Mobile app. The ‘wait=60’ will allow the plugin to wait for a response from the user who has to respond to the challenge using the IBM Verify App on his phone.
If you prefer to use an TOTP challenge instead, you can modify the RADIUS configuration file on Windows (IBMRadiusConfig.json) and set the ‘auth-method’ to ‘password-and-totp’. Then you can open the client VPN connection and use ‘123456:password’ instead of the normal password.
See also : https://www.ibm.com/docs/en/security-verify?topic=server-clients
Additional resource learning material:
https://www.securitylearningacademy.com/course/view.php?id=6901