
Connecting a treadmill to the ibm cloud iot platform
Continuing from the previous blogs, I will explain how to connect a treadmill as a sensor within the IBM Cloud IoT Platform.
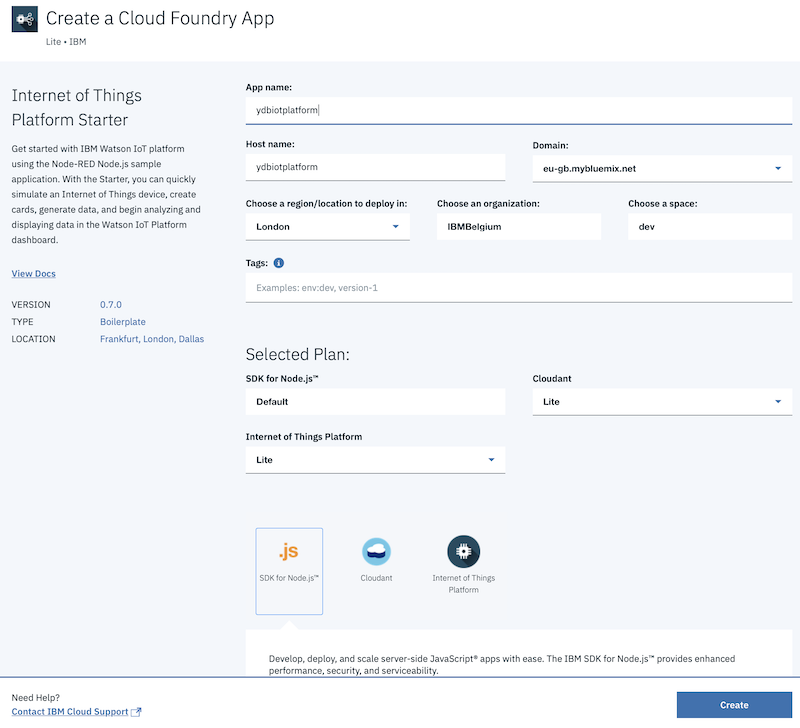
First we need to create a “Internet of Things Platform Starter” kit within https://cloud.ibm.com/catalog?search=Internet%20of%20things&category=starterkits. In order to do this you will need an IBM Cloud account. You can just signup for a free Lite account, no credit card required. The starter kit contains the “Internet of Things” service as well as a “Cloudant” Database and a “Node-Red” runtime, which we will later use to create some dashboards.
Next, launch the “Internet of Things Platform” service, create a device type “ESP32” and a device “ESPRESSIF” (you can pick whatever names you want here). When creating a device you can provide your own authentication token or you can let the system generate one for you. I prefer to set my own, which makes it easier to remember afterwords.
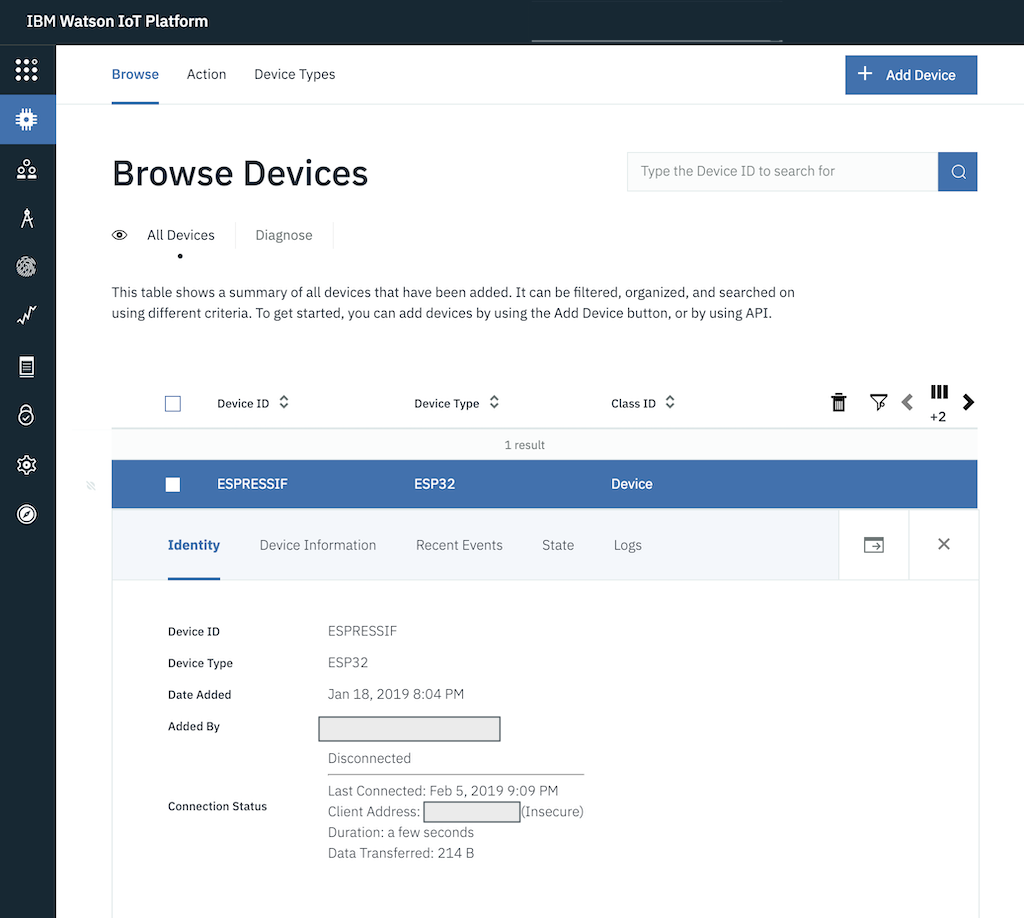
One additional setting we need to do is to set the Security Level for device connections to “TLS Optional” within the IoT platform service security settings since we’re not using any encrypted communication.
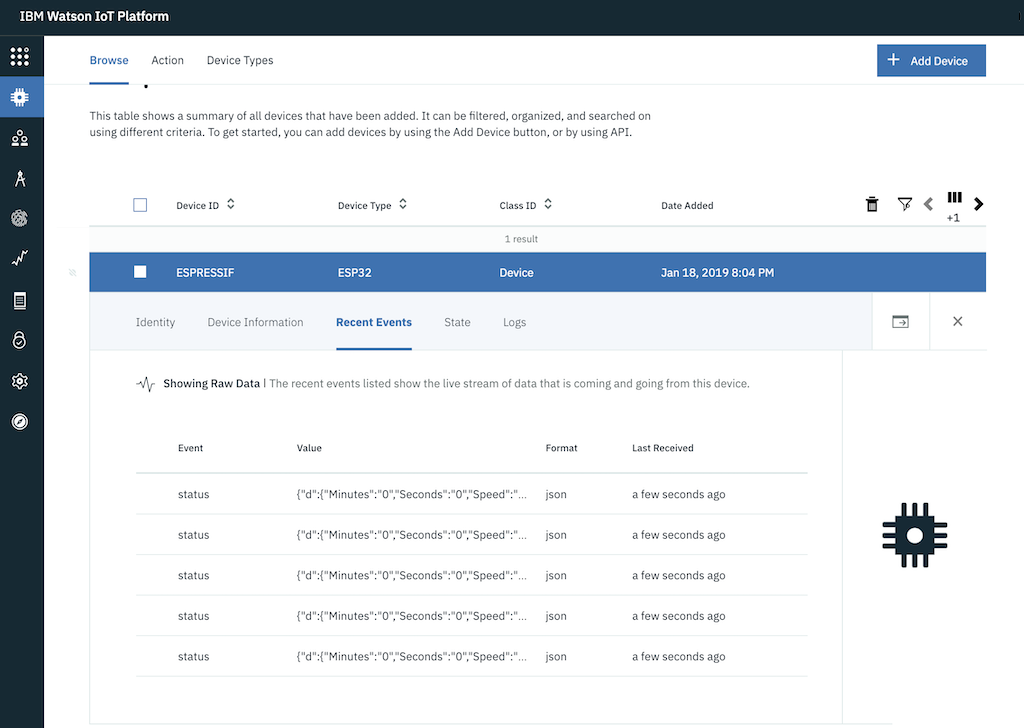
Basically, that’s all we need to setup within the IoT platform. Next we need to adapt the Arduino code to make a connection the IBM IoT service using MQTT. You can find the code here. Just update the MQTT parameters and the wifi credentials and upload the code to the ESP32 module using the Arduino editor. As soon as the ESP32 restarts, you should see the “ESP32” device active within the IBM Cloud IoT dashboard and once the treadmill gets started you should see the JSON payloads coming in.
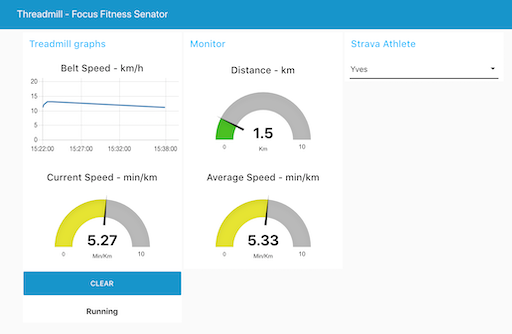
Now that we have the treadmill connected we can start using Node-Red in order to make a dashboard with some gauges and graphs representing the running distance as well as the belt speed and some calculated pace values as shown here.
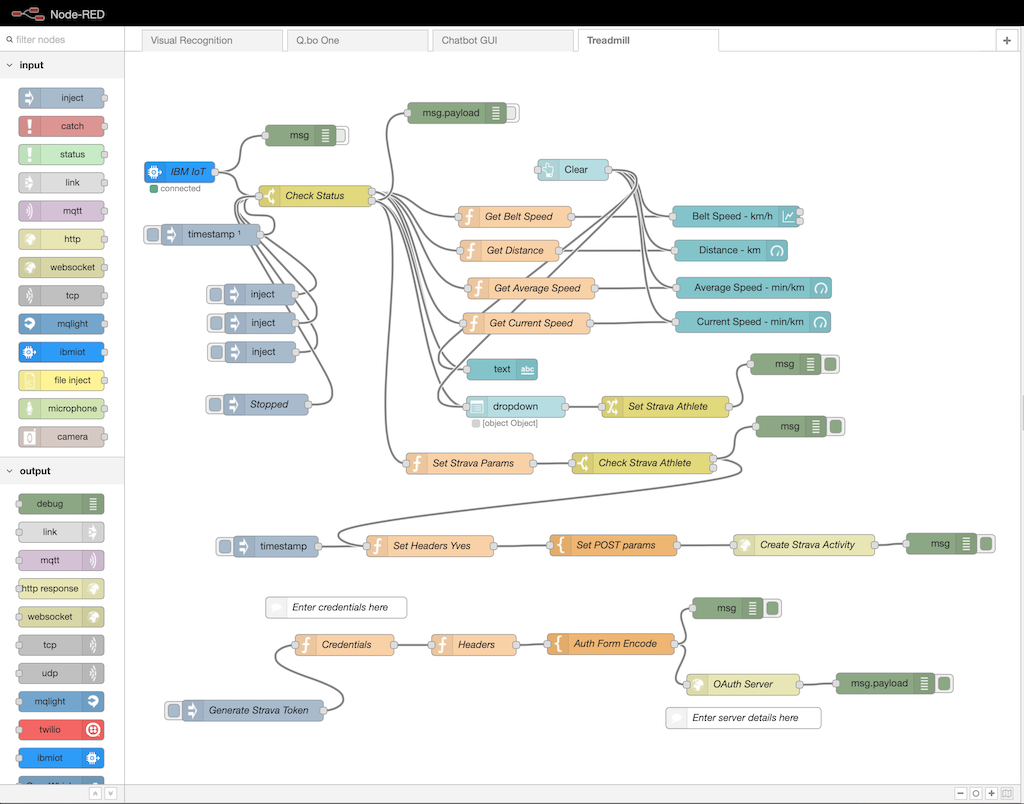
The Node-Red flow contains a blue node “IBM IoT” which is connected to our IoT Platform Service and serves as the main entry point for processing the device data. Every message that the ESP32 pushes via MQTT will arrive here. The next component in the flow is a “switch” node which checks the message payload if we are in a “Running” or in a “Stopped” state. If the treadmill is in a running state we extract the values from the JSON payload and update the dashboard graphs and gauges accordingly. Creating a Node-Red dashboard is quite easy so I won’t explain this here. You can just import the full Node-Red flow from here and explore how it’s built.
Of course when we do a workout on the treadmill, we want to have some traces of our activities. And we all know “If it’s not on Strava, it didn’t happen…”.
When we detect the “Stopped” state we just prepare the data and create a new “Strava” activity. Posting an activity to Strava is a bit more complicated as the Strava API requires Oauth2 for authentication. You can find more details here.
First you will need to create your own API application in strava. Goto https://developers.strava.com and select “Create & Manage Your App”. Once you have completed the required fields, your app should have a Client ID and Secret.
In order to get an Access/Authorization token for posting activities you need to perform the following steps:
-
Create a request URL for Strava authorization, where the base URL is https://www.strava.com/oauth/authorize and parameters are:
- client_id : your application’s ID, obtained during registration
- redirect_uri : URL to which the user will be redirected with the authorization code. A random but unique one or localhost should be fine.
- response_type : must be ‘code’
- scope : ‘read’, ‘read_all’, ‘profile:read_all’, ‘profile:write’, ‘profile:write’, ‘activity:read’, ‘activity:read_all’, ‘activity:write’
- Goto the above URL in a browser.
- Login to Strava and then click ‘Authorize’ and select the required permissions if needed.
- The browser should give you a 404 as http://localhost/exchange_token doesn’t exist.
- Copy the authorization code from the URL. For example, http://localhost/exchange_token?state=&code=c498932e64136c8991a3fb31e3d1dfdf2f859357&scope=write
The authorization code for next step is c498932e64136c8991a3fb31e3d1dfdf2f859357.
- In order to get the final access_token you need to perform a POST to https://www.strava.com/oauth/token as defined here.
You can use any HTTP Rest Client (e.g. Curl) or use the Node-Red flow from above:
$ curl -X POST https://www.strava.com/oauth/token \
-F client_id=5 \
-F client_secret=[REPLACE_WITH_YOUR_CLIENT_SECRET] \
-F code=c498932e64136c8991a3fb31e3d1dfdf2f859357 \
-F grant_type=authorization_code
If you want to use the Node-Red flow to get an access token, make sure to replace the credentials (client-id and secret) and code with your own.
So there you have it. Now that the treadmill is fully connected we can focus on training indoors and sharing our activities on Strava.