A Quick Way To Deploy Code To Kubernetes
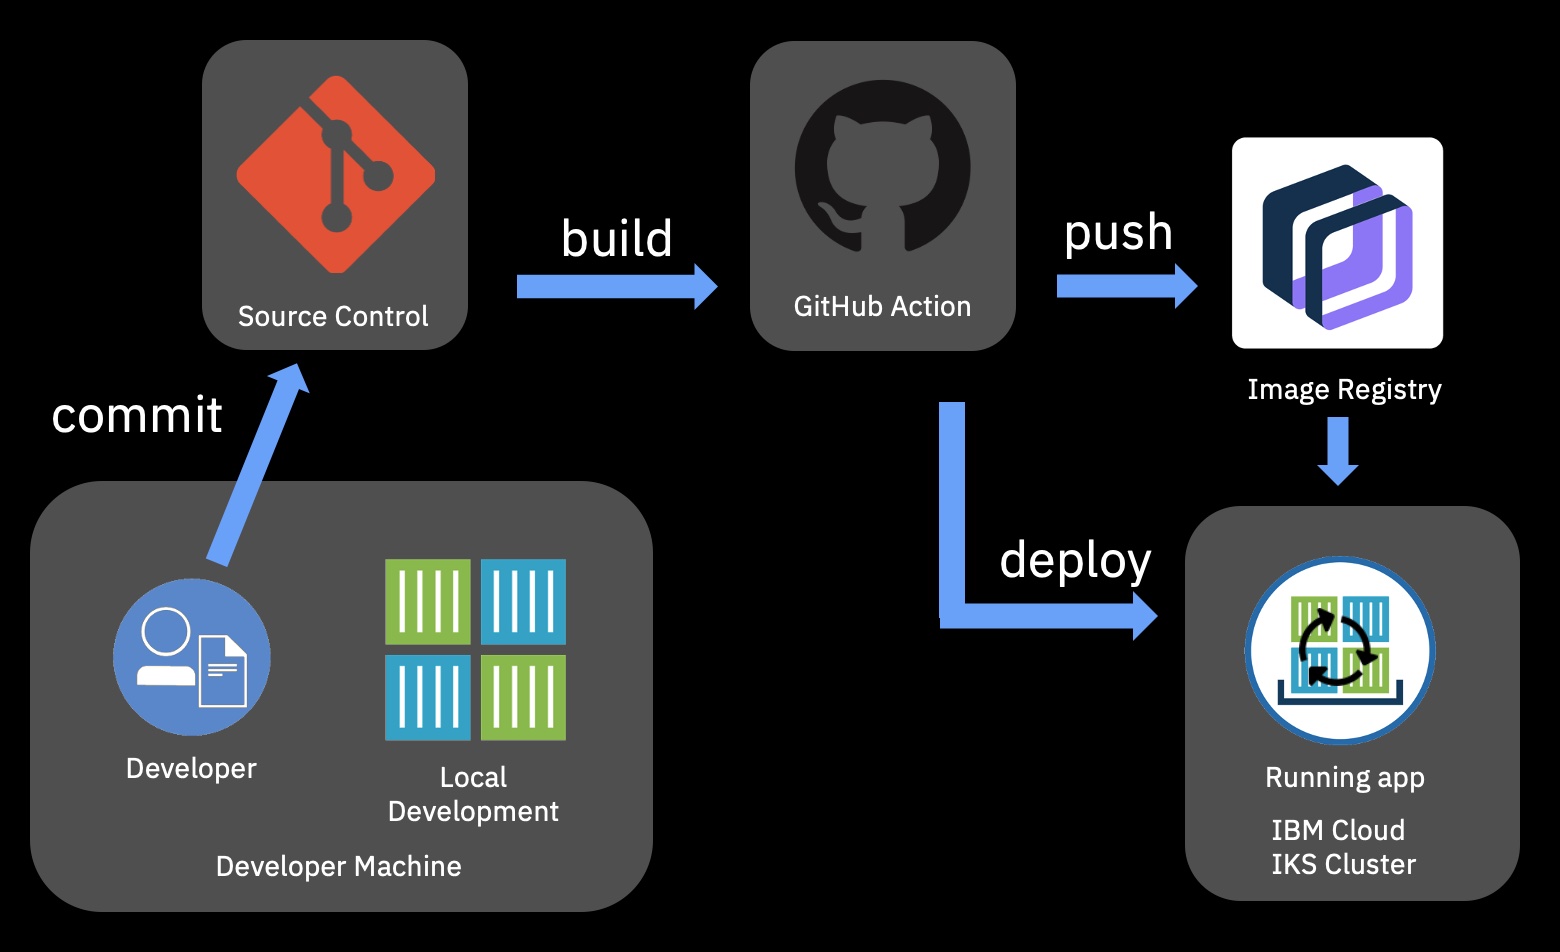
As a developer, we’re always looking for simplification when it comes to deploying code. We like to concentrate on writing code without worrying about infrastructure components. In this article, I will explain how to deploy a sample VueJS application to a IBM Cloud Kubernetes Service cluster.

Normally you would perform the following steps:
- Install IBM Cloud CLI
- Authenticate with IBM Cloud CLI
- Build the Docker image
- Push the image to IBM Cloud Container Registry
- Deploy the Docker image to a IBM Cloud Kubernetes Service cluster
Now you no longer have to perform these steps manually, because there’s GitHub actions which does this all for you.
All you need is a Dockerfile to create the Docker image. You probably already have it when you’re testing on your local machine.
For my sample VueJS application, I use the two-step build : https://github.com/yvesdebeer/vuejs-app/blob/master/Dockerfile
This Dockerfile will first run a “npm run build” in a seperate build-image. The results of this build are then copied to an NGINX runtime which will host the runtime/compiled components the VueJS application.
All we need to do is check-in our code into a GitHub repo (e.g. https://github.com/yvesdebeer/vuejs-app
With just a few clicks, you can leverage GitHub Actions to generate a workflow, which can be customized to your cluster and application needs. Let’s take a look at how to use this new workflow. When you click the “Actions” tab of any GitHub repository, you’ll immediately see IBM Cloud Kubernetes Service as an option for you to deploy on.
When you select Deploy to IBM Cloud Kubernetes Service, a workflow is generated for you.
Before committing the file, be sure to configure the IMAGE_NAME, IKS_CLUSTER and DEPLOYMENT_NAME fields.
Additionally, you’ll need to create two GitHub Secrets, one for your IBM Cloud API key and one for your IBM Cloud Container Registry namespace.
In my cloud environment, I use a Container Registry service which is deployed in Frankfurt so I also changed the IBM_CLOUD_REGION to “eu-de” and the REGISTRY_HOSTNAME to “de.icr.io”. The port is set to 8080 as this is the port that is exposed by the Docker container.
# Environment variables available to all jobs and steps in this workflow
env:
  GITHUB_SHA: $
  IBM_CLOUD_API_KEY: $
  IBM_CLOUD_REGION: eu-de
  ICR_NAMESPACE: $
  REGISTRY_HOSTNAME: de.icr.io
  IMAGE_NAME: vuejs-app
  IKS_CLUSTER: example-iks-cluster-name-or-id
  DEPLOYMENT_NAME: vuejs-app
  PORT: 8080
Since I’m using a Free (Single Node) IKS cluster, I need to access the deployed application via the IP address of the node of my cluster. So I changed the ‘kubectl create service’ command to use ‘nodeport’ instead of ‘loadbalancer’ and also added the final statement ‘kubectl get nodes -o wide’ to see the IP address of the node within the workflow log in order to access the application.
# Deploy the Docker image to the IKS cluster
- name: Deploy to IKS
  run: |
    ibmcloud ks cluster config --cluster $IKS_CLUSTER
    kubectl config current-context
    kubectl create deployment $DEPLOYMENT_NAME --image=$REGISTRY_HOSTNAME/$ICR_NAMESPACE/$IMAGE_NAME:$GITHUB_SHA --dry-run -o yaml > deployment.yaml
    kubectl apply -f deployment.yaml
    kubectl rollout status deployment/$DEPLOYMENT_NAME
    kubectl create service nodeport $DEPLOYMENT_NAME --tcp=80:$PORT --dry-run -o yaml > service.yaml
    kubectl apply -f service.yaml
    kubectl get services -o wide
    kubectl get nodes -o wide
Next we need to commit this workflow into our repository. The deployment workflow will only start once we create a new release of our code. You can monitor the deployment steps within the “actions” tab of the Github repo. If the run completes successfully you should be able to access the application.
Alternatively, if you want to kick-off the deployment when new code is pushed to the repo, just change the GitHub Actions yaml file to :
name: Build and Deploy to IKS

on: [push]
Additional info and instructions:
